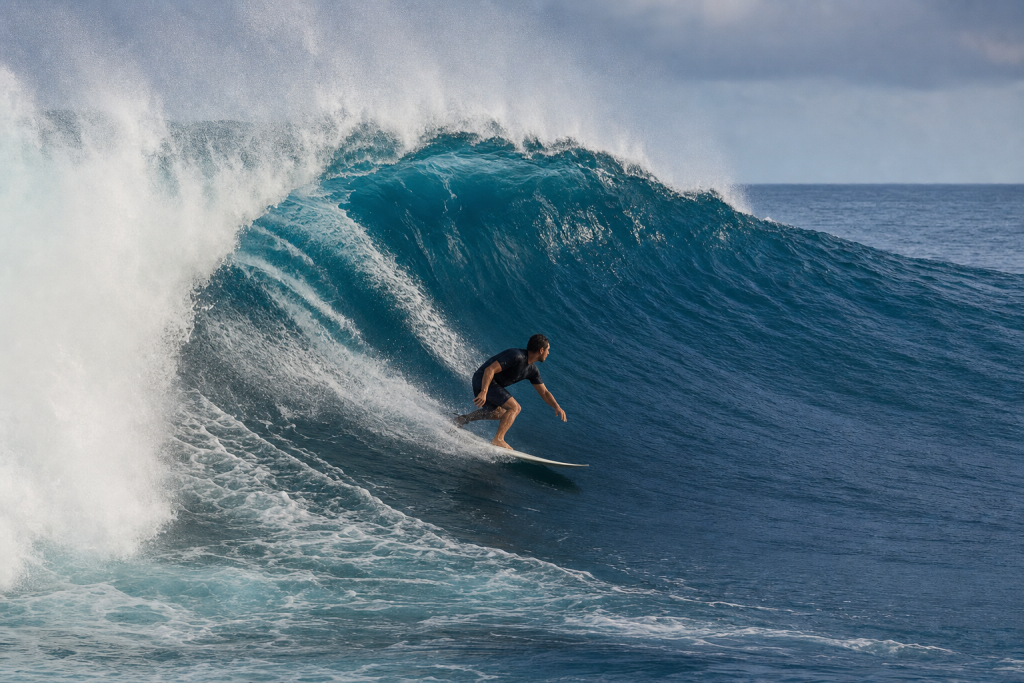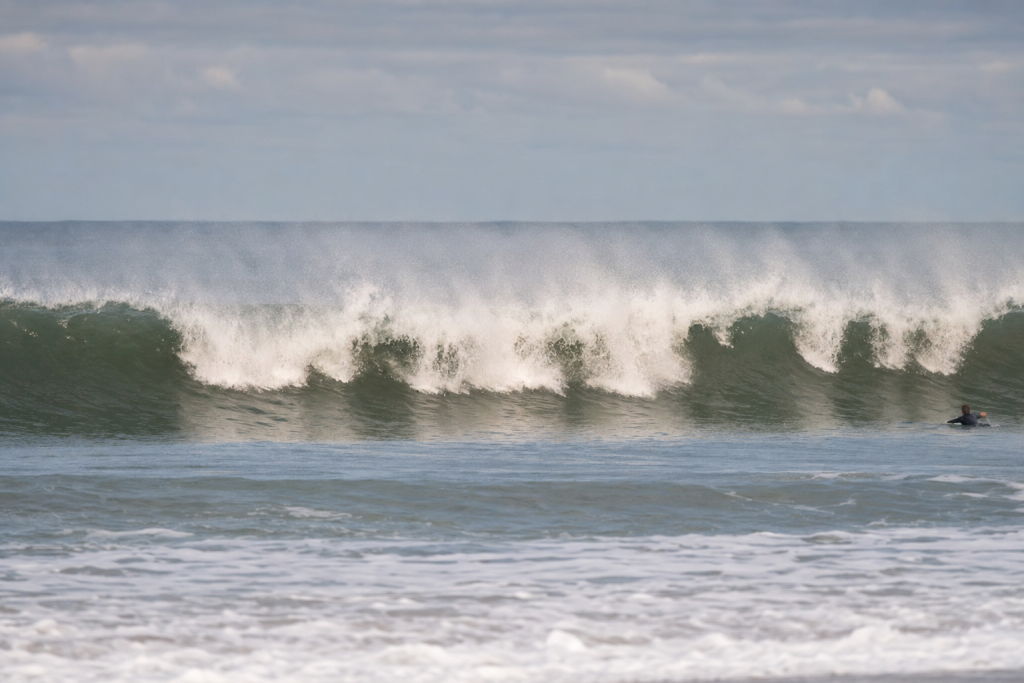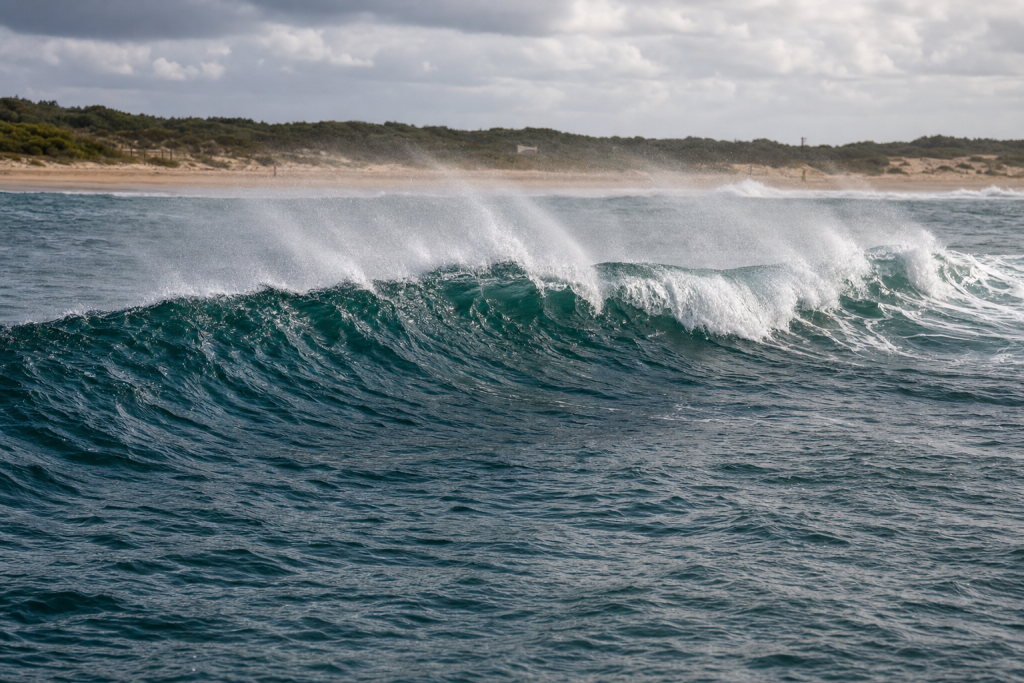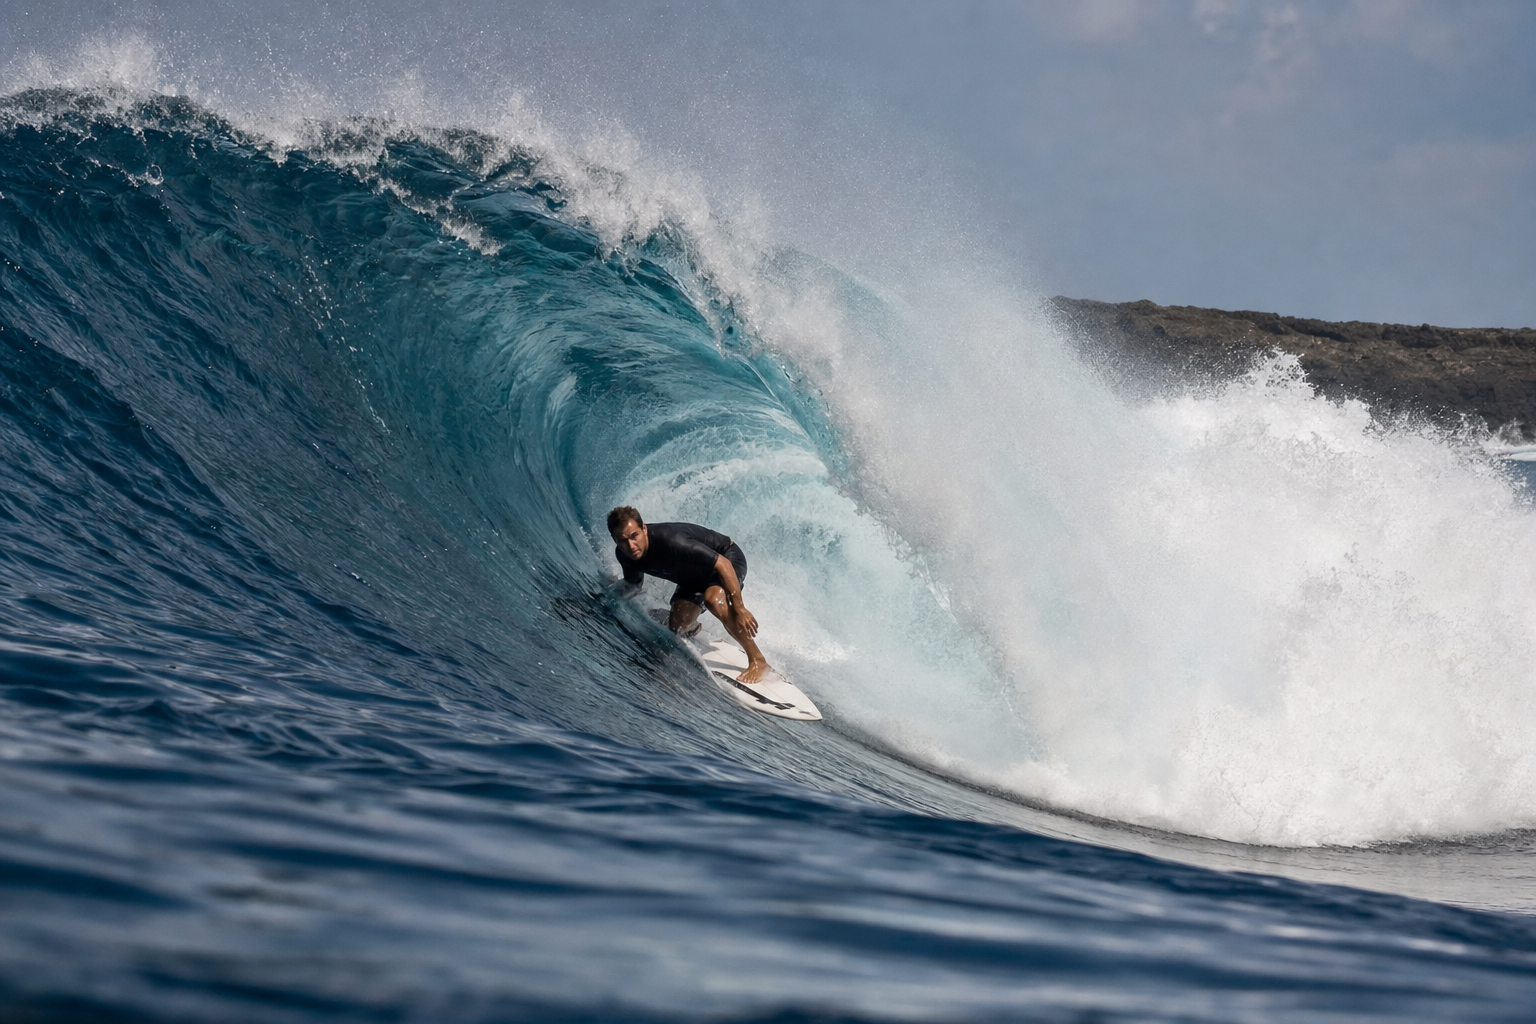
Slab waves are among surfing’s most dramatic natural phenomena: thick-lipped barrels that seem to rise from nowhere, fold over shallow rock or reef, and detonate with terrifying speed. Unlike long, peeling pointbreaks or forgiving beachbreaks, a slab is defined by abruptness. It transforms deep-water swell into a short, steep, hollow wave with almost no transition time. For advanced surfers, slabs offer some of the most intense tube rides on the planet. If you want to go deeper on wave mechanics and positioning before tackling one, a resource like this surf technique book is worth studying. For everyone else, slabs are a fascinating example of how swell energy, seabed shape, tide, and timing can combine to create a wave that looks almost too square to be real.
What Creates Slab Waves?
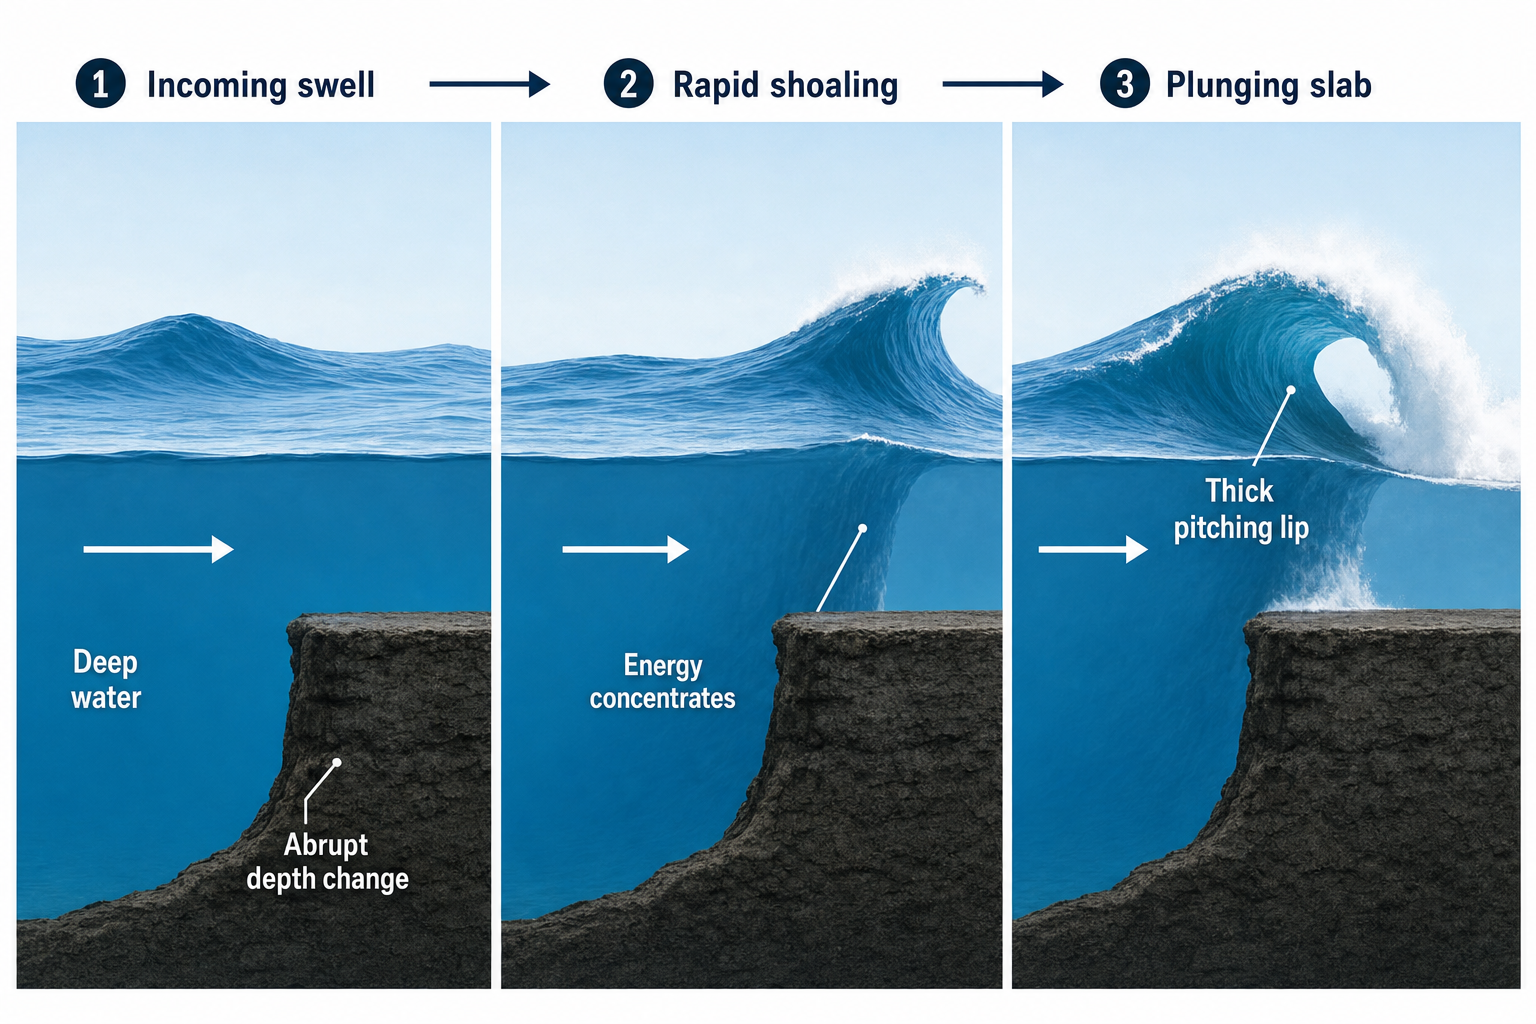
Slab waves form when powerful swell moves from deep water onto a very shallow, abrupt ledge. The seabed rises so quickly that the lower part of the wave slows dramatically while the upper part keeps moving forward. The result is a pitching lip that throws outward rather than crumbling gently. Gear matters when you’re preparing to paddle out at a heavy reef — a dependable surfboard leash is essential when wipeouts are inevitable and losing your board could mean a long, dangerous swim over shallow reef.
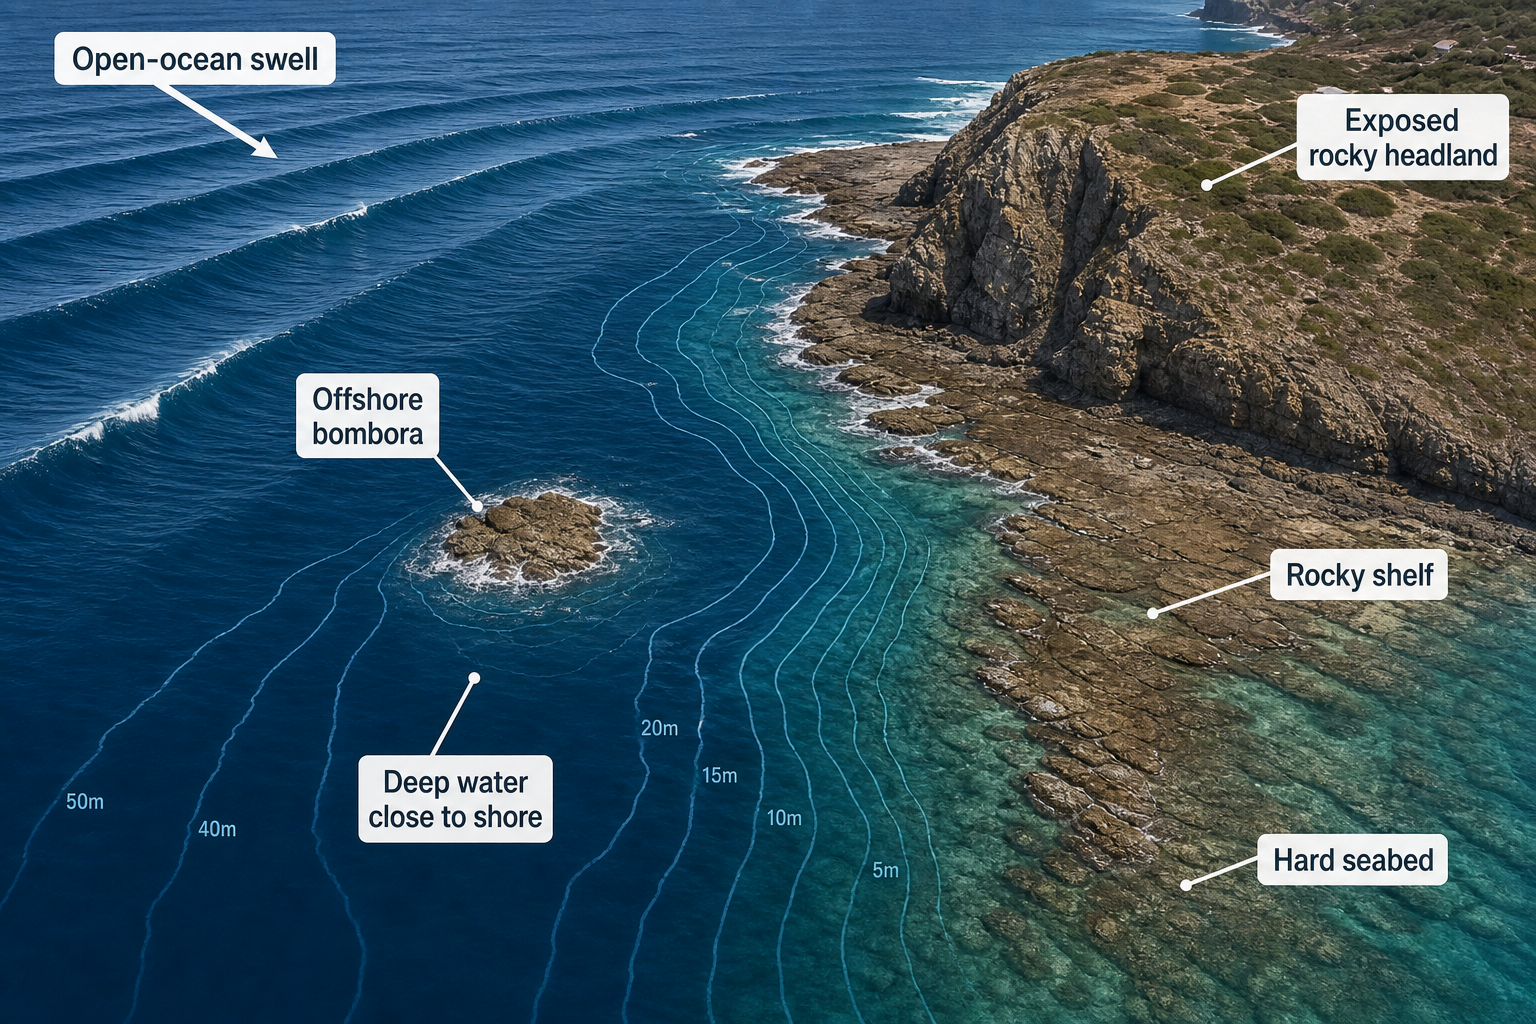
Most slab waves form over rock platforms, coral reefs, or shallow bomboras rather than sand. A slab needs a sudden change in depth, often with deep water sitting very close to the takeoff zone. That deep-to-shallow transition concentrates wave energy into a compact area, making the wave thicker and more explosive than a normal reefbreak of the same size.
Why Slabs Are Different from Normal Reef Waves
A typical reef wave gradually feels the bottom, steepens, and peels down the line. A slab wave has a far more violent interaction with the seabed. Instead of meeting a smooth ramp, the swell strikes a hard step. This can cause the trough to drain below the surrounding sea level while the lip heaves over the ledge.
The classic slab look comes from three key ingredients:
- An abrupt seabed gradient: deep water sitting directly next to a shallow shelf.
- Strong groundswell: enough energy to bend and thicken over the reef.
- A defined ledge or bowl: a reef shape that focuses the wave into a barrel rather than a closeout.
Slab Wave Shape, Power, and Surfing Quality
Slab waves are usually short, intense, and extremely hollow. Their surfing quality isn’t measured by length. A slab may only offer a few seconds of ride time, but those seconds can include a heavy drop, a deep barrel, and a clean exit if the wave is shaped correctly.
Height and Thickness of Slab Waves
Slabs are often deceptive from the channel or from shore. A wave might not look especially tall at first glance, yet the lip can be unusually thick. In slab surfing, lip thickness matters almost as much as wave height. A head-high slab with a square barrel can feel heavier than a much taller, softer wave.
Some slabs work at only a few feet. Others don’t show their true character until they reach double-overhead or larger. Big-wave slabs can produce faces well over 20 feet, especially when long-period swell hits an exposed reef with deep water close by.
Steepness and Hollowness of Slab Waves
Steepness is a slab’s defining feature. The takeoff often happens on a ledge where water is drawing hard off the reef. The surfer may need to paddle into a wave that’s already below them, then drop into a trough that seems to disappear beneath their feet.
Hollowness comes from the pitching lip. Instead of folding softly down the face, the lip throws outward and creates a barrel with a wide opening. Many slabs look “square” because the barrel is nearly as wide as it is tall. The heaviest ones resemble a moving cave more than a conventional wave.
Speed and Power of Slab Waves
Slab waves are fast because they unload energy in a compact space. The breaking section can move quickly across the ledge, and the barrel can clamp without warning. The surfer has very little time to adjust once the takeoff is committed.
The power comes from concentrated swell energy. Long-period waves carry energy deep below the surface. When that energy reaches a shallow ledge, it has to go somewhere — and in a slab, it goes upward and forward in the form of a thick lip and a violent impact zone.
How Hard Are Slab Waves to Surf?
Slab waves are among the most difficult waves to surf. They demand advanced wave reading, precise positioning, strong paddling, and genuine commitment to steep takeoffs. Even experienced surfers who are comfortable in hollow reef waves can struggle with slabs because the margin for error is so narrow.
The challenge isn’t only the wave’s size — it’s the timing. Many slabs shift quickly because the peak is affected by boils, backwash, and small changes in swell direction. A surfer can be perfectly positioned for one wave and completely out of place for the next.
Why Slab Waves Are Not for Beginners
Beginners learn best on waves with a predictable takeoff, a softer face, and room for small mistakes. Slabs offer the opposite. The takeoff zone is narrow, the drop is steep, and the barrel forms immediately. There is no forgiving shoulder where a surfer can stand up slowly and find their footing.
Intermediate surfers may be able to study slabs from the channel and understand how they work, but actually riding them requires a high level of experience in hollow reef conditions. Protective gear becomes particularly relevant here — wearing an impact vest can reduce the risk of injury when a heavy lip lands on you, and a surf helmet is strongly worth considering at reef breaks where the bottom is shallow and unforgiving.
How to Surf Slab Waves
Surfing slab waves starts before you ever paddle out. The best slab surfers spend time watching the reef, studying set patterns, and identifying which waves are actually makeable. Slabs reward patience far more than bravado.
Positioning for Slab Waves
Positioning is everything. On a normal wave, being slightly too far inside or outside may still allow a ride. On a slab, a matter of feet can be the difference between a clean barrel and a wave that runs away without you.
The takeoff spot is usually close to a boil, a rock marker, or a visible ledge feature. The ideal position is often deeper than it appears from shore, but not so deep that the wave clamps shut. A surfer needs to be close enough to catch the wave early yet angled enough to avoid free-falling straight onto the reef below.
The Slab Wave Takeoff
The takeoff on a slab is usually late, steep, and angled. The surfer often needs to paddle hard, commit early, and get to their feet without any hesitation. A slow pop-up can put the surfer behind the lip before the ride has even begun.
Angling the board slightly down the line is important on most slabs. A straight takeoff may work on some waves, but the majority of slab barrels require immediate directional commitment. Too much angle can cause the rail to skip out. Too little can result in being swallowed by the pitching lip.
Riding the Barrel on Slab Waves
Once inside the barrel, small adjustments matter more than big movements. The surfer may need to hold a high line to stay above the foam ball, then compress as the lip throws over. On a fast slab, pumping too aggressively can cause the board to chatter. On a slower slab, stalling may be needed to stay in the tube.
The best line depends entirely on the wave’s shape. Some slabs offer a clean, almond-shaped exit. Others have sections that bend, step, or warp due to the reef geometry below. Experienced slab surfers read these changes as they happen and adjust with subtle rail pressure.
Choosing a Board for Slab Waves
Board choice depends on the size and speed of the slab. For paddle-in slabs, many surfers use a step-up with extra length, added volume, and a rounded pin tail. The length helps with entry speed, and the pin tail provides hold on a steep face.
For smaller slabs, a compact board with enough paddle power can work well if it holds a rail. For very large slabs, surfers may turn to longer guns or tow boards depending on the spot. In all cases, control is more important than looseness. Fin choice plays into this directly — a set of FCS fins or futures-compatible fins that prioritize drive and hold will serve you better than something designed for looseness and pivot. A solid surf traction pad is also worth having dialed in — you need your back foot locked in the right place the moment you stand.
How to Recognize Rideable Slab Waves
A rideable slab isn’t simply the biggest or most dramatic wave in the set. The best one has a defined takeoff, a barrel that opens, and an exit that stays ahead of the foam ball. Learning to separate makeable waves from unmakeable ones is one of the most critical skills in slab surfing.
Signs of a Rideable Slab Wave
A makeable slab usually shows a clear peak and a tapered shoulder. The lip throws hard, but it doesn’t land across the entire line at once. There is some diagonal movement down the reef, even if the wave is very hollow.
Look for these clues:
- A focused peak: the wave stands up in one main takeoff zone rather than spreading across the ledge.
- A running shoulder: the barrel has somewhere to go down the line.
- A visible exit: the end section stays open long enough to escape cleanly.
Good slab waves often have a moment where the face draws smooth just before pitching. That smooth window gives the surfer a line to follow. If the face is already broken, warped, or crossed by backwash before you’re even on the wave, things are going to be much harder.
Signs of an Unmakeable Slab Wave
An unmakeable slab often looks too square for too long. If the entire ledge throws at once, the barrel may have no shoulder and no exit — creating a closeout that looks spectacular from the channel but offers no real line. Other warning signs include a lip that lands far out into flat water, a peak that shifts across the reef, or a section that pinches shut immediately after takeoff. If the wave is drawing too much water off the ledge, the first section may be impossible to set a rail on.
Ideal Bottom Structure for Slab Waves
The best slab waves form over a seabed that is abrupt but not random. A clean ledge creates power. A shaped ledge creates rideability. The difference between a terrifying closeout and a world-class slab often comes down to the exact geometry of the reef below.
Seabed Gradient and Slab Wave Power
A steep seabed gradient is essential. The wave needs to move from deep to shallow water quickly enough to pitch. If the gradient is too gradual, the wave may crumble or break like a standard reef. If the ledge is too abrupt, the wave may explode without forming a clean rideable face.
Many great slabs have deep water sitting very close to the break. This allows long-period swell to arrive with most of its energy intact. When that energy strikes the ledge, the wave jacks up suddenly and throws forward with force.
Reef Shape and Slab Wave Quality
A high-quality slab usually has some kind of curve, wedge, or channel in the reef. A perfectly straight ledge tends to produce closeouts. A reef with a diagonal angle lets the wave peel, even if only briefly.
Channels are especially useful because they allow energy to escape and create a defined shoulder. They also help mark the end of the ride. Without a channel or tapering section of reef, the wave may simply blow up across the entire platform.
How Swell Direction Affects Slab Waves
Swell direction can completely change a slab. The same reef may be perfect on one swell angle and totally unrideable on another. Because slabs are so dependent on bathymetry, even small directional shifts can alter the takeoff, barrel shape, and exit.
The Best Swell Angle for Slab Waves
The best swell angle is usually direct enough to hit the ledge with full power but angled enough to create a peeling line. A swell arriving too straight tends to close out. A swell arriving too obliquely may miss the ledge entirely or break with little energy.
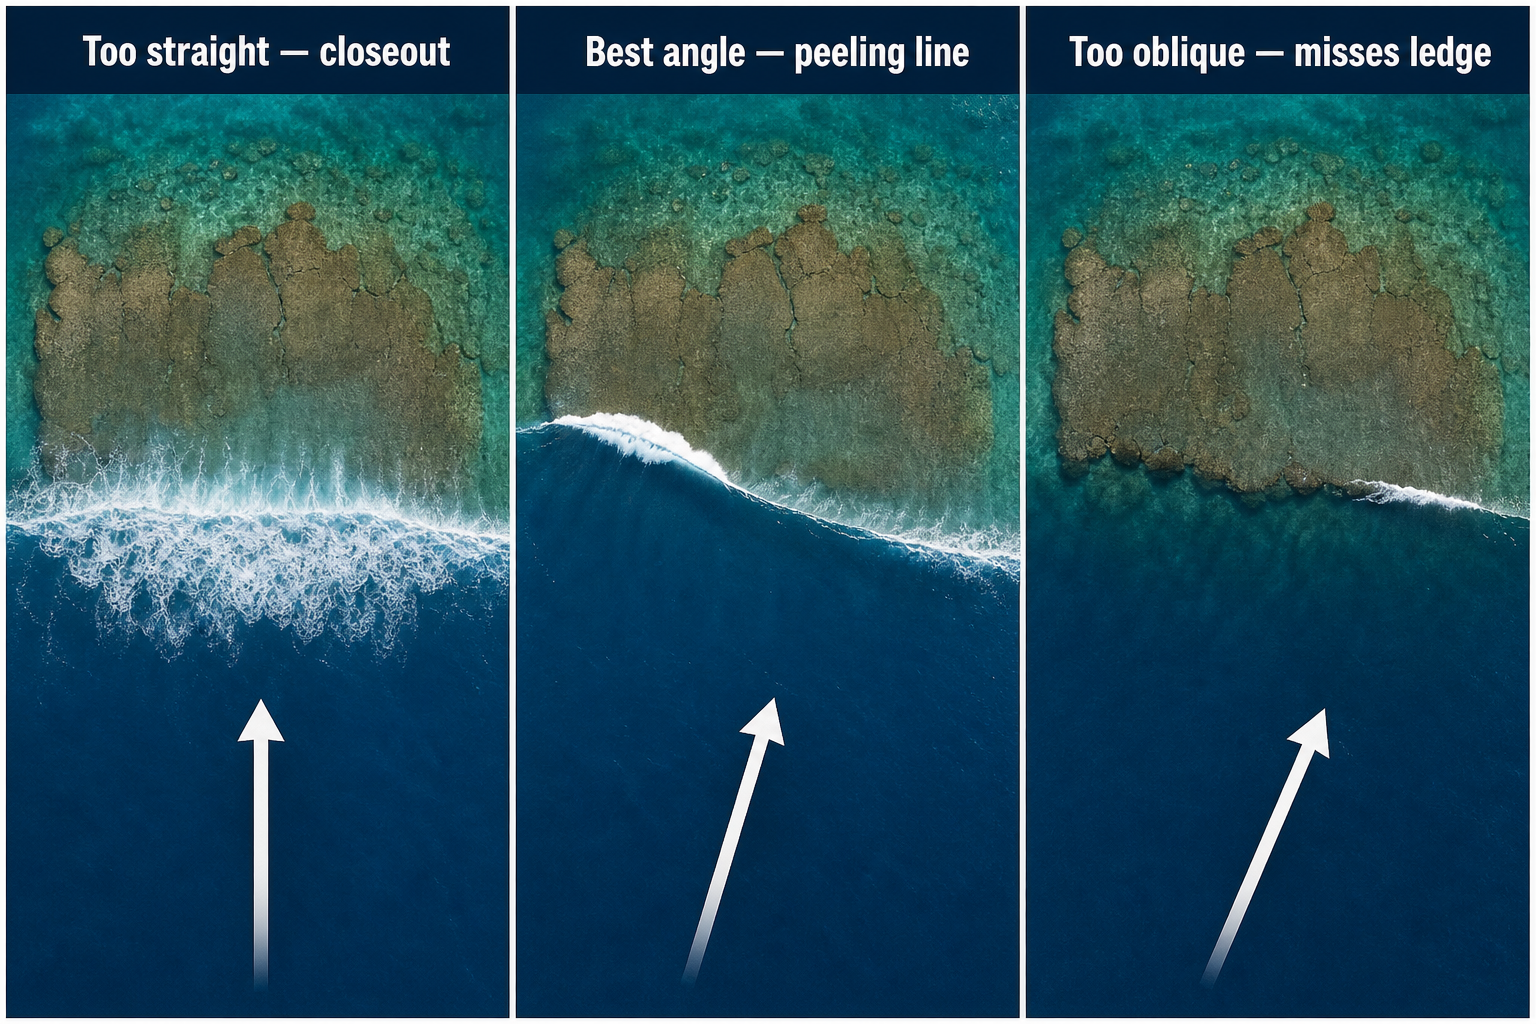
Many slabs have a narrow swell window — a difference of ten or fifteen degrees can determine whether the wave barrels cleanly or folds into itself. Local knowledge is invaluable because charts show swell direction offshore, while refraction can bend that swell significantly before it reaches the reef.
Swell Refraction and Focusing on Slab Waves
Refraction occurs when swell bends as it enters shallower water. Around reefs and headlands, refraction can focus energy directly onto a slab, making the break larger than nearby spots even when the open-ocean swell is identical. Some slabs also behave like wedges, where incoming swell rebounds off a cliff or reef wall and crosses with the next wave, creating a thicker peak and a more dramatic barrel.
Best Swell Period for Slab Waves
Swell period is one of the most important factors in slab formation. Period is the time interval between waves in a swell train. Longer-period swells carry more energy and feel the bottom in deeper water, which means they arrive at the reef with more force intact.
For many slabs, the prime range is roughly 14 to 20 seconds. At this period, the swell has enough energy to stand up hard over the ledge. Very long-period swells can be spectacular, but they may also over-focus, shift wide, or cause sections to close out.
Short-Period Swell on Slab Waves
Short-period swell can still make a slab break, especially if the spot is exposed and the reef is very shallow. However, the wave may be lumpier and less organized, and it may lack the thick, clean lip that defines classic slab conditions. Periods under around 12 seconds often produce less predictable slabs, though there are exceptions in stormy regions where short-period energy is powerful and local wind is favorable.
Long-Period Swell on Slab Waves
Long-period swell is often what transforms a ledge into a true slab. It approaches with more energy below the surface, then reacts powerfully when it reaches shallow water. The wave draws harder off the reef, creates a deeper trough, and throws a heavier lip. At some spots, periods above 20 seconds can become problematic — the wave may break farther out, double up, or close out sections that are otherwise rideable. The ideal period is always spot-specific.
Best Wave Height and Tide for Slab Waves
Slab waves need enough swell to properly activate the ledge. Too small, and the wave may not break correctly or may break directly onto dry reef. Too large, and the slab may shift, wash through, or turn into a full closeout.
Best Wave Height for Slab Waves
There’s no universal answer because every slab has a different reef depth and exposure. Smaller slabs may be best from head-high to double-overhead. Heavier slabs may not reach world-class form until they’re considerably larger. A useful general rule is to look for the size that lets the wave throw while still peeling. Too small often means ledgy and shallow with no open face. Too big often means the wave breaks beyond the ideal section of reef or closes across the entire ledge.
Best Tide for Slab Waves
Tide changes the depth over the ledge, which has a direct effect on slab quality. Lower tide generally makes slabs hollower because there is less water cushioning the reef. Higher tide can soften the wave, slow the draw, and create a more forgiving face.
Many slabs are best on a mid tide, often with the tide on the push. The incoming tide adds water over the ledge while preserving enough hollowness for a proper barrel. Some slabs prefer low tide because they need maximum ledge exposure. Others need higher tide because they’re simply too shallow otherwise. Cold-water reef breaks may also call for a full wetsuit and reef booties to protect your feet on a bad wipeout and keep you comfortable through a long session.
Wind and Surface Conditions for Slab Waves
Clean wind is critical at slab breaks. Offshore wind holds the lip open and grooms the face, but too much of it can make entry difficult by blowing up the face and delaying the drop. Light winds or calm conditions are often ideal. A cross-offshore angle can be excellent if it aligns with the barrel direction. Onshore wind usually ruins slabs quickly by chopping up the face and disrupting the pitching lip.
Other Factors That Help Create Good Slab Waves
Several smaller variables can decide whether a slab is average or exceptional. Because these waves are so sensitive to conditions, the best sessions often happen in short windows when multiple factors align.
Backwash and Water Movement on Slab Waves
Backwash can come from cliffs, reef shelves, or steep shorelines. Sometimes it disrupts the face with unwanted bumps. In other cases, it crosses the incoming swell and creates a thicker wedging peak. Water movement across the reef also affects the takeoff — if a previous set has drained the ledge, the next wave may stand up harder. Too much water rushing across the platform can make the face bumpy or unpredictable.
Season, Storm Track, and Swell Consistency
The best slab regions are usually exposed to powerful storm systems and open-ocean groundswell. Southern Ocean storms feed many slabs in Australia and Tasmania. North Atlantic storms power slabs along the coastlines of Ireland and Portugal. South Pacific swells light up reefs across Tahiti and Hawaii. Seasonal patterns matter because swell angle and period shift throughout the year — a spot may only have a handful of days each season when the swell hits the ledge exactly right.
Where to Find Slab Waves
Slab waves are most common along coastlines with hard seabeds and direct exposure to powerful swell. Look for reefs, rocky shelves, volcanic ledges, and deep water close to shore. Remote headlands and offshore bomboras are particularly promising. Marine charts can offer useful clues — a sudden depth contour change near a reef is a strong indicator of slab potential, especially when there’s a protected channel nearby. That said, many slabs only reveal their true character after being observed through multiple tides and swell directions.
Famous Slab Wave Surf Spots
Some of the world’s most respected heavy waves are slabs, or have strong slab characteristics. Each one works differently, but all demonstrate how shallow reef and powerful swell can produce extreme barrels.
Teahupo’o, Tahiti
Teahupo’o is one of the most famous slab waves on Earth. It breaks over a shallow coral reef at the end of a deep-water pass, where long-period South Pacific swell rises suddenly and throws into an exceptionally thick left barrel. The wave is known for its below-sea-level trough, its round heavy tube, and the sheer volume of water moving through the lip.
Shipstern Bluff, Tasmania
Shipstern Bluff is a cold-water slab with an unpredictable personality. It breaks over a complex reef ledge and is notorious for its “steps” — sudden warbles that form mid-face during the drop and can throw a surfer off their line completely. Southern Ocean swell, rugged bathymetry, and an exposed coastline combine to make it one of the most intimidating waves in surfing.
The Right, Western Australia
The Right is a massive right-hand slab in Western Australia that receives powerful Southern Ocean swell and breaks over a shallow offshore reef. The wave produces enormous, round barrels with a lip that looks impossibly thick for its height. It is often associated with tow surfing when conditions reach their largest.
Cyclops, Western Australia
Cyclops is one of the most extreme slab examples anywhere in the world. It is a short, square, violent wave that detonates over very shallow reef. Its barrel is often wider than it is tall, and the wave is known more for its sheer intensity than its ride length.
Ours, Cape Solander, Australia
Ours, located at Cape Solander near Sydney, is a shallow slab that breaks close to a rock ledge. It works on the right swell direction and tide, producing thick barrels that unload in a compact zone. The wave is highly sensitive to swell angle and water level.
Shark Island, Australia
Shark Island near Cronulla is a well-known right-hand reef slab with a ledging takeoff, a fast barrel, and sections that can become extremely hollow as swell wraps across the reef. It has been one of Australia’s most influential heavy-water waves for decades.
The Box, Western Australia
The Box is a short, powerful right near Margaret River that turns Indian Ocean swell into a square barrel over a shallow reef ledge. It’s known for its abrupt takeoff and compact, technical tube — one of the more honest tests of slab surfing ability in the region.
Mullaghmore Head, Ireland
Mullaghmore is a cold-water big-wave reef with pronounced slab-like sections. North Atlantic swell hits a complex reef and produces huge, ledging barrels that rank among the heaviest in Europe. While it differs from a compact Western Australian slab, its heavy takeoff and hollow sections place it firmly in modern heavy-wave surfing.
Pipeline, Hawaii
Pipeline isn’t always described as a pure slab, but it shares many defining slab characteristics. It breaks over a shallow lava reef and produces extremely hollow barrels, especially at First Reef on solid north swells. Its combination of reef geometry, swell direction sensitivity, and long-period North Pacific energy has made it one of the most studied tube-riding waves in surfing history.
Gear and Preparation for Slab Surfing
Beyond board choice and fin setup, a few other pieces of gear are worth thinking about before surfing serious slabs. Making sure your board is properly waxed matters more than people sometimes realize — surf wax matched to the water temperature gives you grip when you’re popping up fast on a steep drop. In warmer conditions, a UPF rash guard keeps you protected during long sessions in the sun while you’re waiting for the right set.
If you’re filming sessions at slab breaks, a waterproof action camera like this 4K action camera mounted on the beach or in the channel can help you review your positioning and timing afterward. Pairing it with a high-capacity 256GB microSD card means you won’t have to stop recording mid-session. And after a heavy wipeout involving the reef, having a surfboard ding repair kit on hand can save a board from taking on water before you get another session in.
What Makes Slab Waves Special?
Slab waves compress surfing into its most critical form. There’s no long setup, no gentle entry, and almost no time to think. The wave rises, drains, throws, and either offers a brief perfect tube or shuts down completely. That binary nature is part of what makes them so compelling to watch and so demanding to surf.
Understanding slabs also deepens a surfer’s knowledge of waves more broadly. They illustrate how bathymetry controls breaking shape, how swell period changes power delivery, and how small variations in tide can transform a break from dangerous closeout to perfect barrel. A slab is not just a “heavy wave” — it is a precise interaction between ocean energy and seabed geometry.
For advanced surfers, slabs represent one of the highest tests of timing and commitment the ocean can offer. For observers, they’re a striking reminder that the best waves aren’t created by swell alone. They’re created when swell meets the right ledge, at the right angle, with the right amount of water over the reef. When those factors align, a slab wave becomes one of the most intense and unforgettable rides in surfing.